Create an Automation
How to create and change an Automation by asking in the chat, with tips for writing your request
You create Automations in the project chat. Describe the work you want to hand to the AI agent in plain language, and the AI builds the Automation.
Creating an Automation
Start a new Automation
Click the Add new card in the project's Project tab and choose Create an Automation. A new chat for creating the Automation opens.
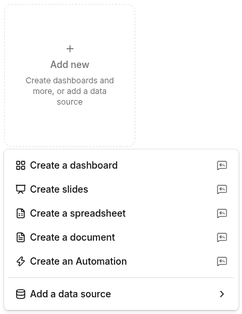
Say what you want
Covering what, when, and where gets you closest to what you have in mind.
"Every Monday at 9 am, compare last week's CPA and CVR by campaign with the week before, and email the marketing team what stands out and how to improve."
"Every morning, find customers showing upsell opportunities or churn signals, and send each owner the actions to take."
The AI may ask follow-up questions in a card, such as which data to load or when to run. Pick an option or type your answer, then click Submit and continue.
Choose where to send notifications
If your Automation sends notifications, a Where should notifications be sent? card appears in the chat. Choose the destinations and click Answer.
- Email — under Send via Email, choose Send to all project members at once, Send to some project members, or Do not send email
- Slack — choose Slack to select the destination channels
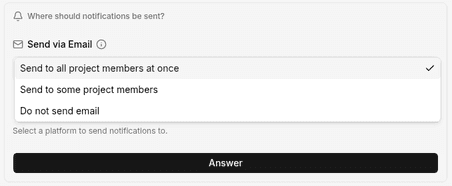
If you are sending to Slack for the first time, connect it from the card. See Set up Slack notifications.
Review the new Automation
After creating the Automation, the AI checks the configuration and reports the result in the chat. The Automation appears as a card in the project's Project tab.
Open the card to see the flow of steps, the schedule, and the run history. See Check runs and history.
Tips for writing your request
| Include | Example |
|---|---|
| What to look at | "yesterday's sales", "last week's CPA and CVR by campaign" |
| What you want done | "compare with the week before", "add what stands out and how to improve", "summarize it in a report" |
| When to run | "every morning at 7", "weekdays at 6 pm", "on the 1st of every month" |
| When to send | "if any product dropped 20% or more", "every time" |
| Where to send | "to #sales-alert", "email the marketing team", "to each owner" |
| What to do on failure | "if it fails, tell #sales-alert" |
Adding a time zone makes the timing unambiguous (for example, "9 am New York time"). You can check the time zone that was set on the Automation screen.
Changing an Automation
You change an Automation in the chat. Click Change Automation on the Automation screen to start a chat about that Automation.
"Change the threshold to 10%", "Run it at 8 instead", "Also send it by email", "Stop the schedule"
Stopping the schedule keeps the Automation. You can still run it any time with Run now on the Automation screen.