Check runs and history
Check an Automation's flow and run history, and run or stop it manually
The Automation screen shows the flow of steps, the schedule, and past results. You can also run an Automation without waiting for its schedule, or stop one that is running.
The Automation screen
Open an Automation's card in the editor's Project tab to see its screen.
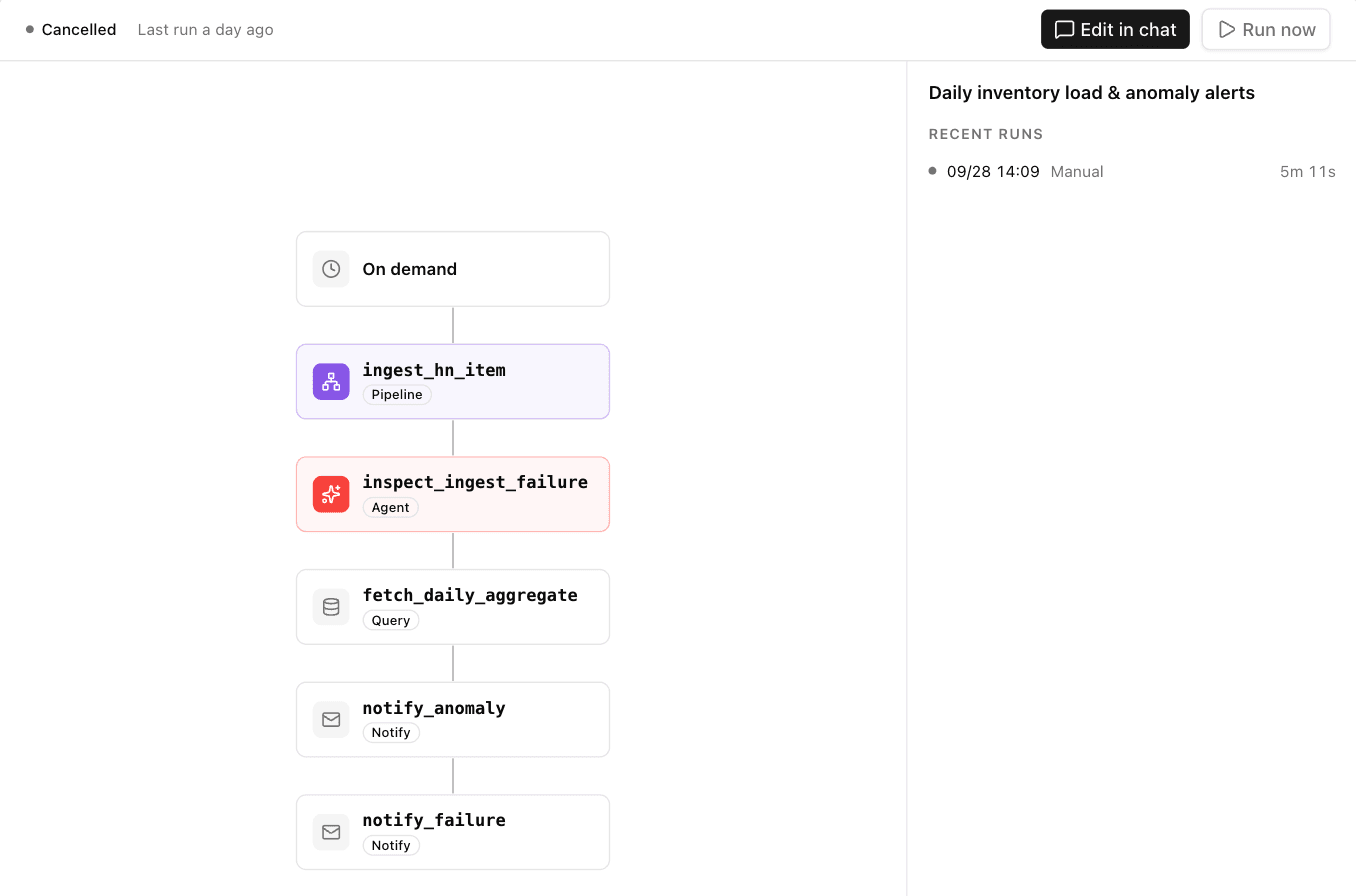
- Left — the flow of steps, with each step's kind and whether it worked in the last run
- Right — details for the step you select. With nothing selected, recent runs are shown
- Select the trigger at the top to see the schedule and the next run time
Running and stopping
| Button | What it does |
|---|---|
| Run now | Runs the Automation without waiting for the schedule |
| Stop | Stops a running Automation. The remaining steps are skipped |
| Edit in chat | Changes the Automation in the chat |
Running and stopping require Creator access or higher on the project.
The same Automation cannot run twice at once. If you click Run now while it is running, wait for the current run to finish, or stop it first.
Reading the run history
Recent runs on the right side of the screen lists the 20 most recent runs. Each row shows when it ran, the trigger, and how long it took.
| Trigger | Meaning |
|---|---|
| Scheduled | Ran automatically on the schedule |
| Manual | Started with Run now |
| Chat | A test run by the AI to check a new or changed Automation |
| API | Started via the API |
Select a row to open the run. You can see each step's result, the data load status (completed, failed, and waiting counts), and the Credits used by that run.
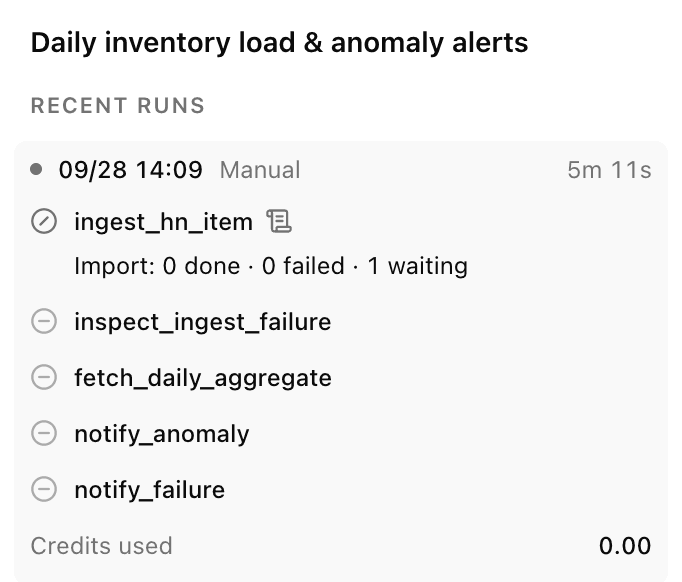
A run's status is Succeeded, Failed, Running, or Cancelled.
Notify steps show Sent, Not sent, or Failed to send for each destination. Not sent means the AI followed an instruction like "only send when a condition is met" and decided there was nothing to send.
A single run can take up to 3 hours. Failed runs are not retried automatically; the next scheduled run happens as usual.