2. Setting up a Cloud Development Environment with GitHub Codespaces
This chapter covers setting up a development environment using GitHub Codespaces. After completing this chapter, you'll have an environment where you can write code in your browser.
Cloud Approach to Solving Development Environment Complexity
Traditional programming learning often saw people give up at the development environment setup stage.
Installing Python, Node.js, various libraries, setting paths, version management—these tasks varied by OS, and one mistake could break the entire system. When working on multiple projects simultaneously, version conflicts and environment pollution could occur, troubling even experienced engineers.
Browser-based development environments fundamentally solve these problems.
Nothing gets installed on your computer. With just a web browser, you can start programming immediately. It works the same way on Windows, Mac, and Chromebook, and configuration mistakes don't affect your local environment.
Even more remarkably, this environment is identical to what engineers worldwide actually use. GitHub Codespaces is utilized by open-source project developers and corporate engineering teams.
You can now learn vibe coding using the latest cloud development environment with the same tools as the pros.
Forking Starter Template and Launching Codespaces
Let's actually launch a cloud development environment.
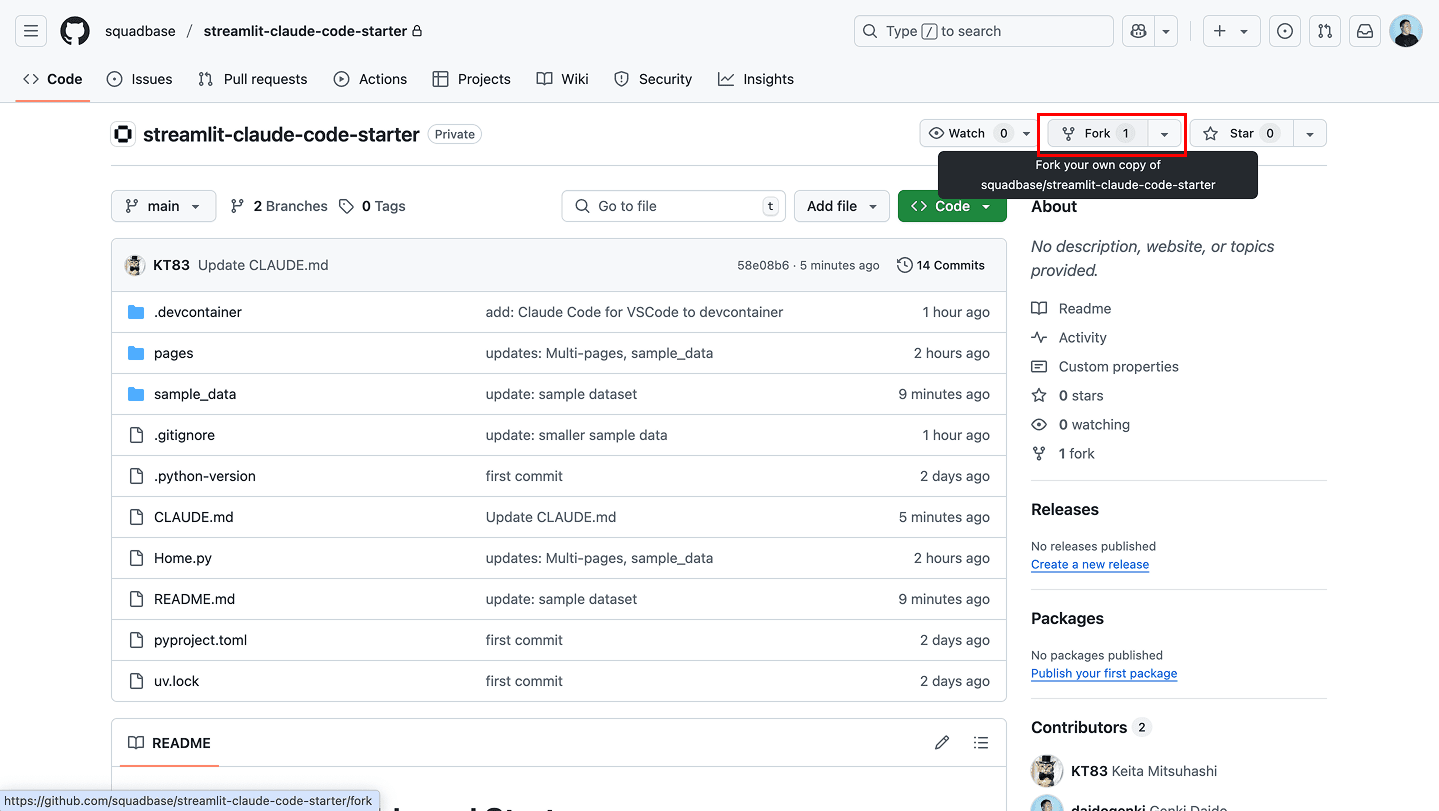
First, let's get the Streamlit starter template used in this book. Visit https://github.com/squadbase/streamlit-claude-code-starter. This template contains the basic Streamlit application configuration.
On the template repository page, click the "Fork" button in the top right. Forking means copying someone else's repository to your account. This allows you to make changes freely without affecting the original repository.
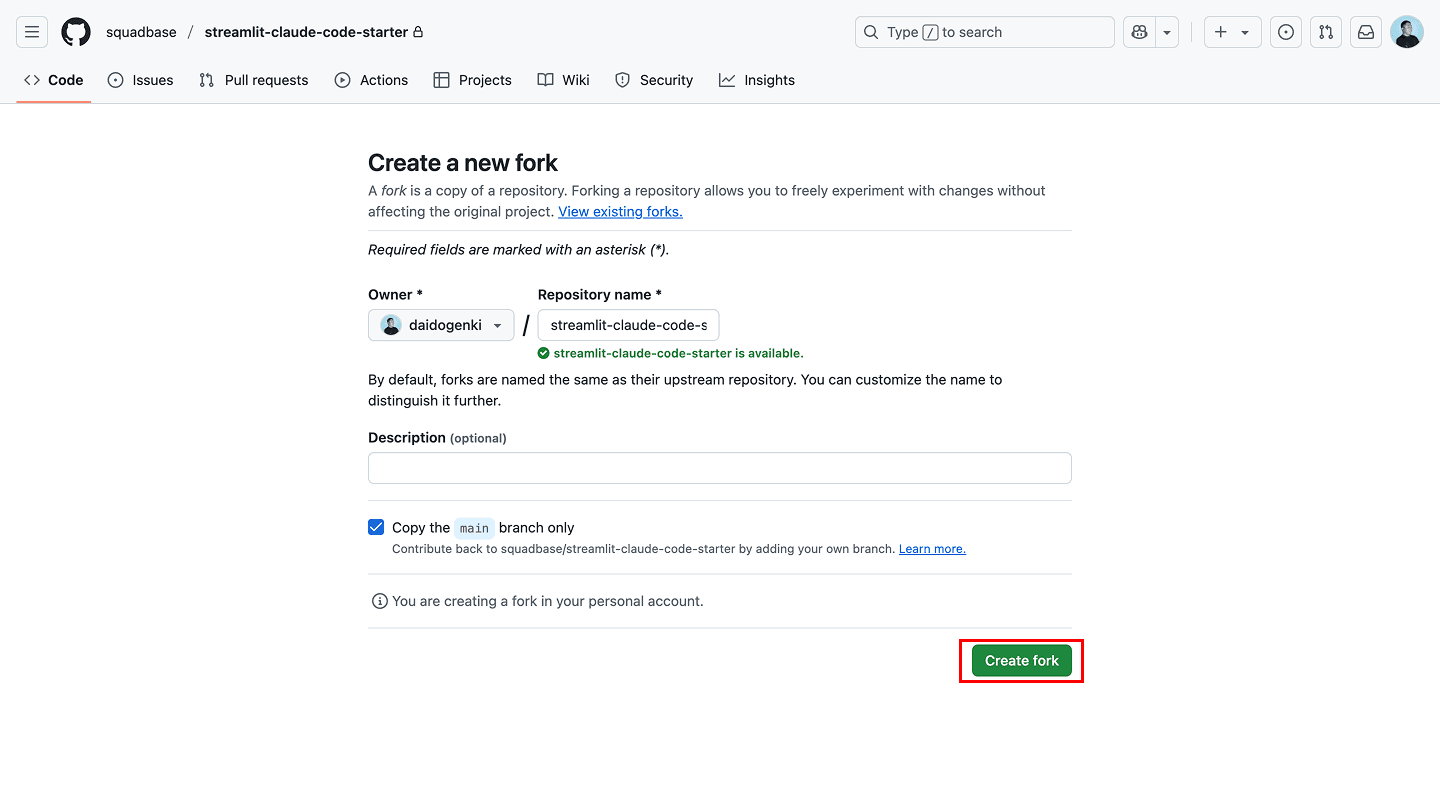
Once forking is complete, a repository will be created in your account. On this repository's page, click the green "Code" button, select the "Codespaces" tab, and click "Create codespace on main."
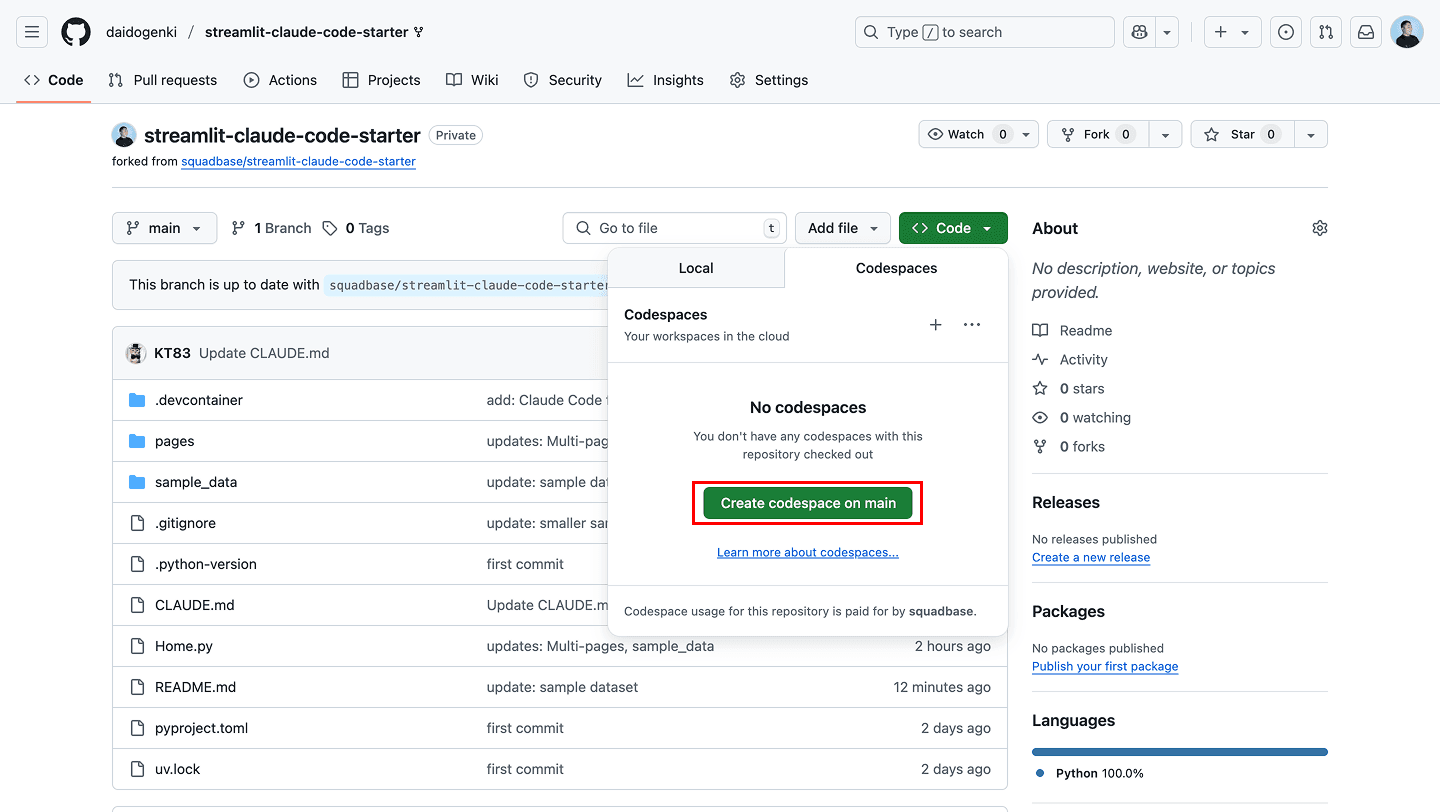
Clicking this will build a development environment in the cloud. The first startup takes 2-3 minutes, but necessary software and libraries are automatically installed.
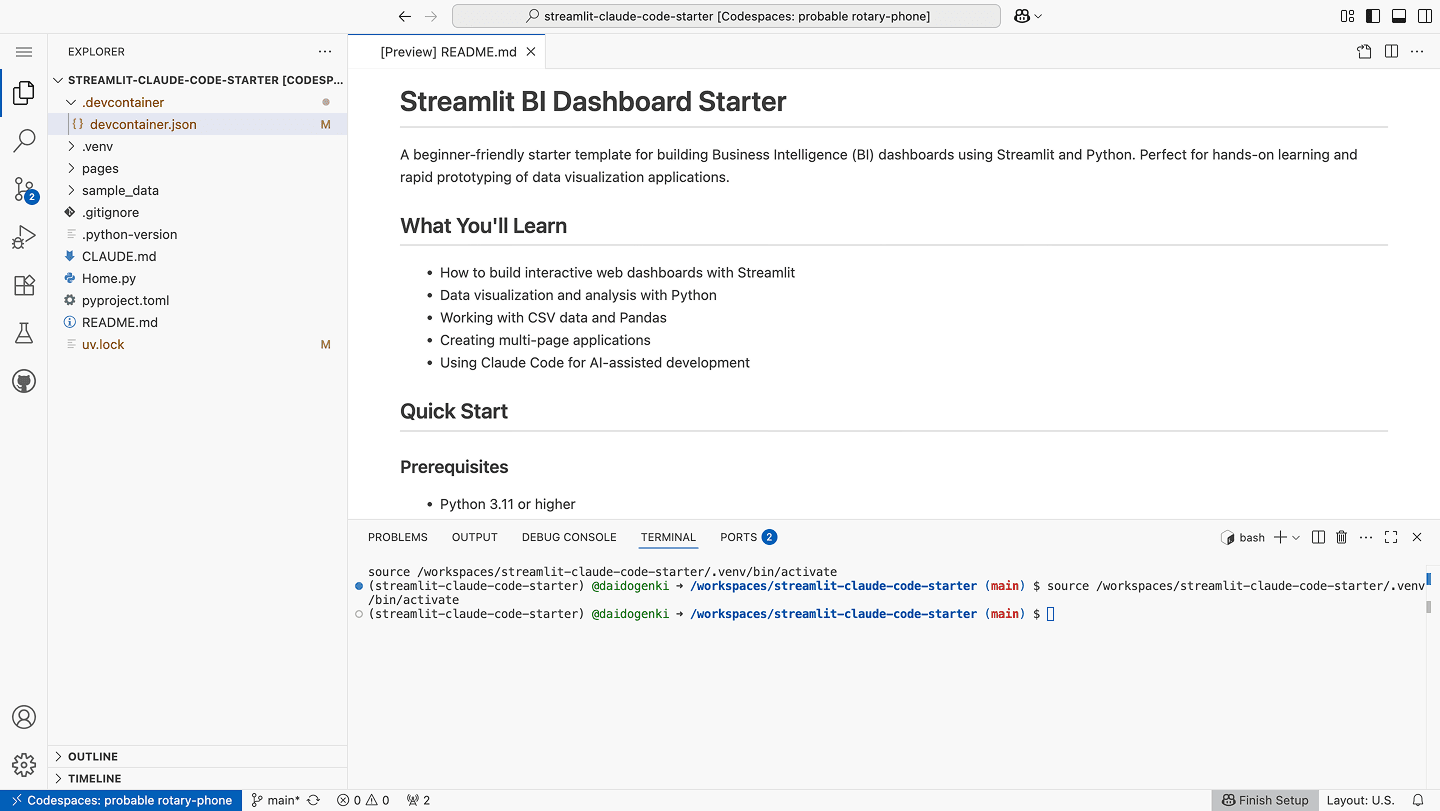
Once startup is complete, the VS Code (Visual Studio Code) web interface appears in your browser. This is a popular code editor used by engineers worldwide.
The left file explorer shows the project file list. The central editor area is for code editing. The bottom terminal allows command execution.
Understanding and Utilizing the uv Package Manager
Package managers play an important role in Python development.
A package manager is a system that automates and handles the management processes of computer programs—installation, upgrades, configuration, and uninstallation—in a consistent manner.
We'll use "uv," a latest high-performance package manager.
For non-engineer learners, waiting time is one factor that leads to giving up. Using uv fundamentally solves this problem and provides a comfortable learning experience.
Practical Exercise - First Streamlit Execution
Let's actually execute commands and launch a Streamlit application.
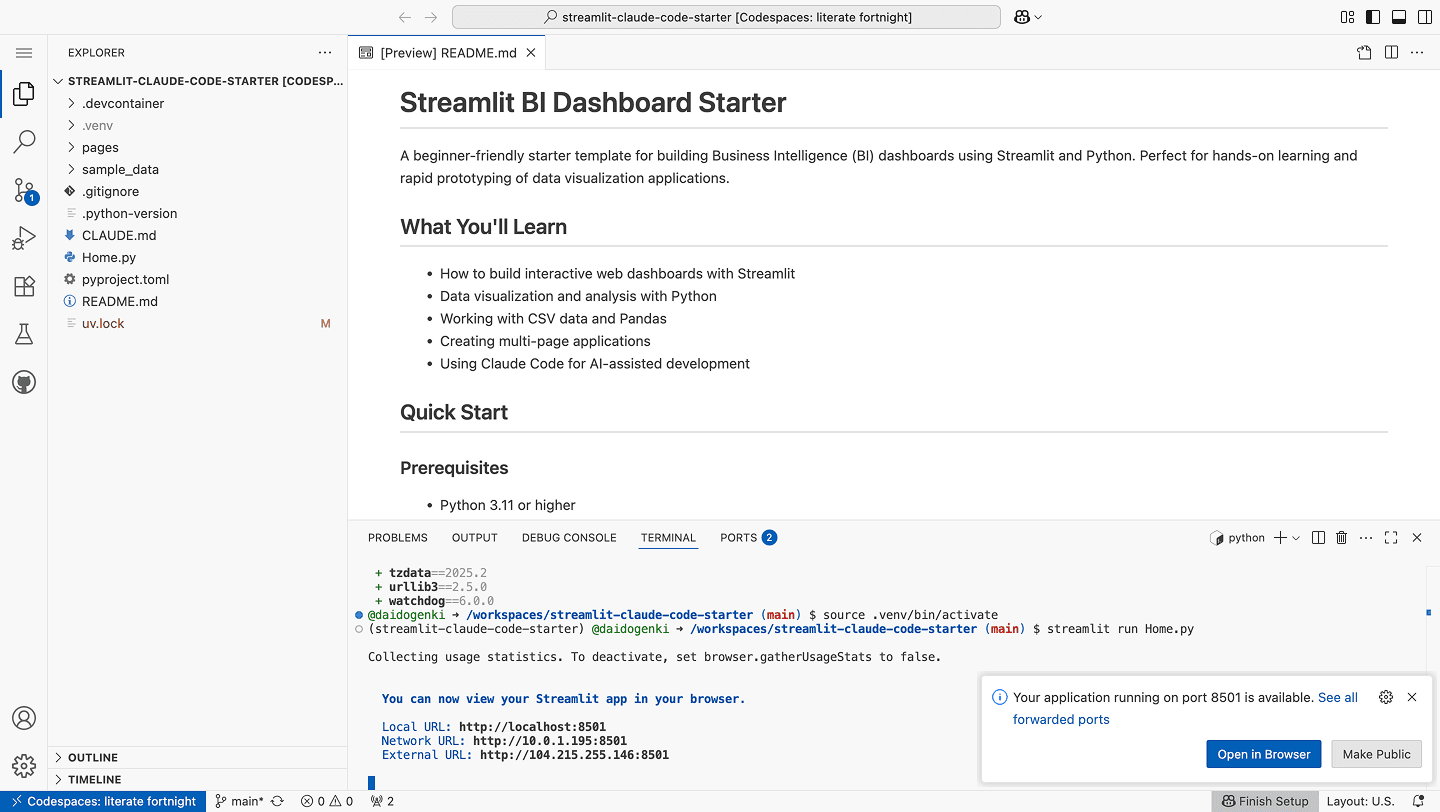
First, confirm that your Codespaces environment screen looks like the following. If it does, you're ready to launch the Streamlit application.
Normally, development requires these three steps:
-
Installing uv: Install
uvso it can be used. -
Installing project dependencies: Install the "components (libraries)" needed to run the project. Specifically, use the
uv synccommand to install everything at once based on information in thepyproject.tomlanduv.lockfiles. -
Activating virtual environment: Make the created independent "workspace" actually usable. This ensures only components installed specifically for this project are used.
However, this time these preparations are automatically handled by the configuration file .devcontainer/devcontainer.json.
Let's launch the application.
Executing the following command will start the Streamlit application described in Home.py and display a URL for viewing the application in a browser. In the Codespaces environment, port forwarding is automatically configured, allowing you to open the application in your browser.
streamlit run Home.pyCommand execution screen:
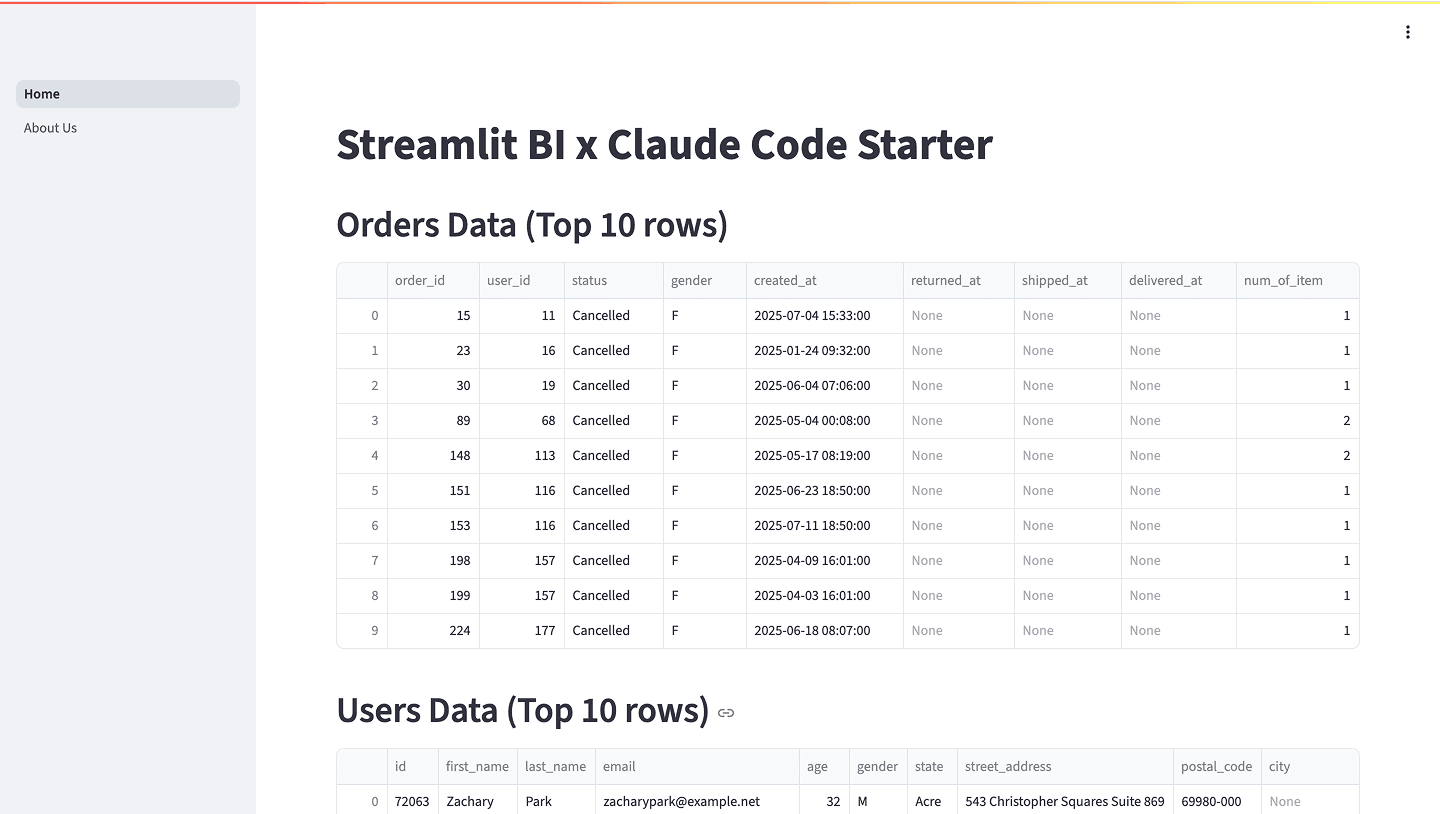
Application screen:
When performing new command operations, you need to stop the application execution.
To stop application execution, press Ctrl+C in the terminal screen where you input commands.
Before proceeding to the next chapter, let's stop the application once.
Review and Next Steps
With the work so far, you now have an environment where you can write code in your browser without complex local installation work.
Items completed:
- Launching development environment with GitHub Codespaces
- Understanding basic concepts of uv package manager
- First launch of Streamlit application
In the next chapter, we'll deepen code understanding using Claude Code. While overcoming fear of the terminal, we'll advance programming through dialogue with our AI development partner.
Get your first dashboard in 10 minutes
Free to get started · No credit card required
Start talking to your data