Building Cloud Development Environment with GitHub Codespaces
In this chapter, we'll set up a development environment using GitHub Codespaces. After completing this chapter, you'll have an environment where you can write code in your browser.
A Cloud Approach to Solving Development Environment Complexity
In traditional programming education, many people gave up at the development environment setup stage.
Installing Python, Node.js, various libraries, setting paths, and version management—these tasks had different procedures depending on the OS, and a single mistake could break the entire system. Additionally, when working on multiple projects simultaneously, version conflicts and environment pollution could occur, troubling even experienced engineers.
Browser-based development environments fundamentally solve these problems.
Nothing gets installed on your computer. You can start programming immediately with just a web browser. It works the same way on Windows, Mac, or Chromebook, and if you make configuration mistakes, it won't affect your local environment.
What's even more remarkable is that this environment is the same as what engineers worldwide actually use. GitHub Codespaces is utilized by open-source project developers and corporate engineering teams.
You can now learn vibe coding using the latest cloud development environment with the same tools as professionals.
Forking Starter Template and Launching Codespaces
Let's actually launch a cloud development environment.
First, we'll get the Next.js starter template used in this book. Go to https://github.com/squadbase/nextjs-claude-code-starter. This template contains the basic Next.js application structure.
On the template repository page, click the "Fork" button in the upper right. Forking means copying someone else's repository to your account. This allows you to make changes freely without affecting the original repository.

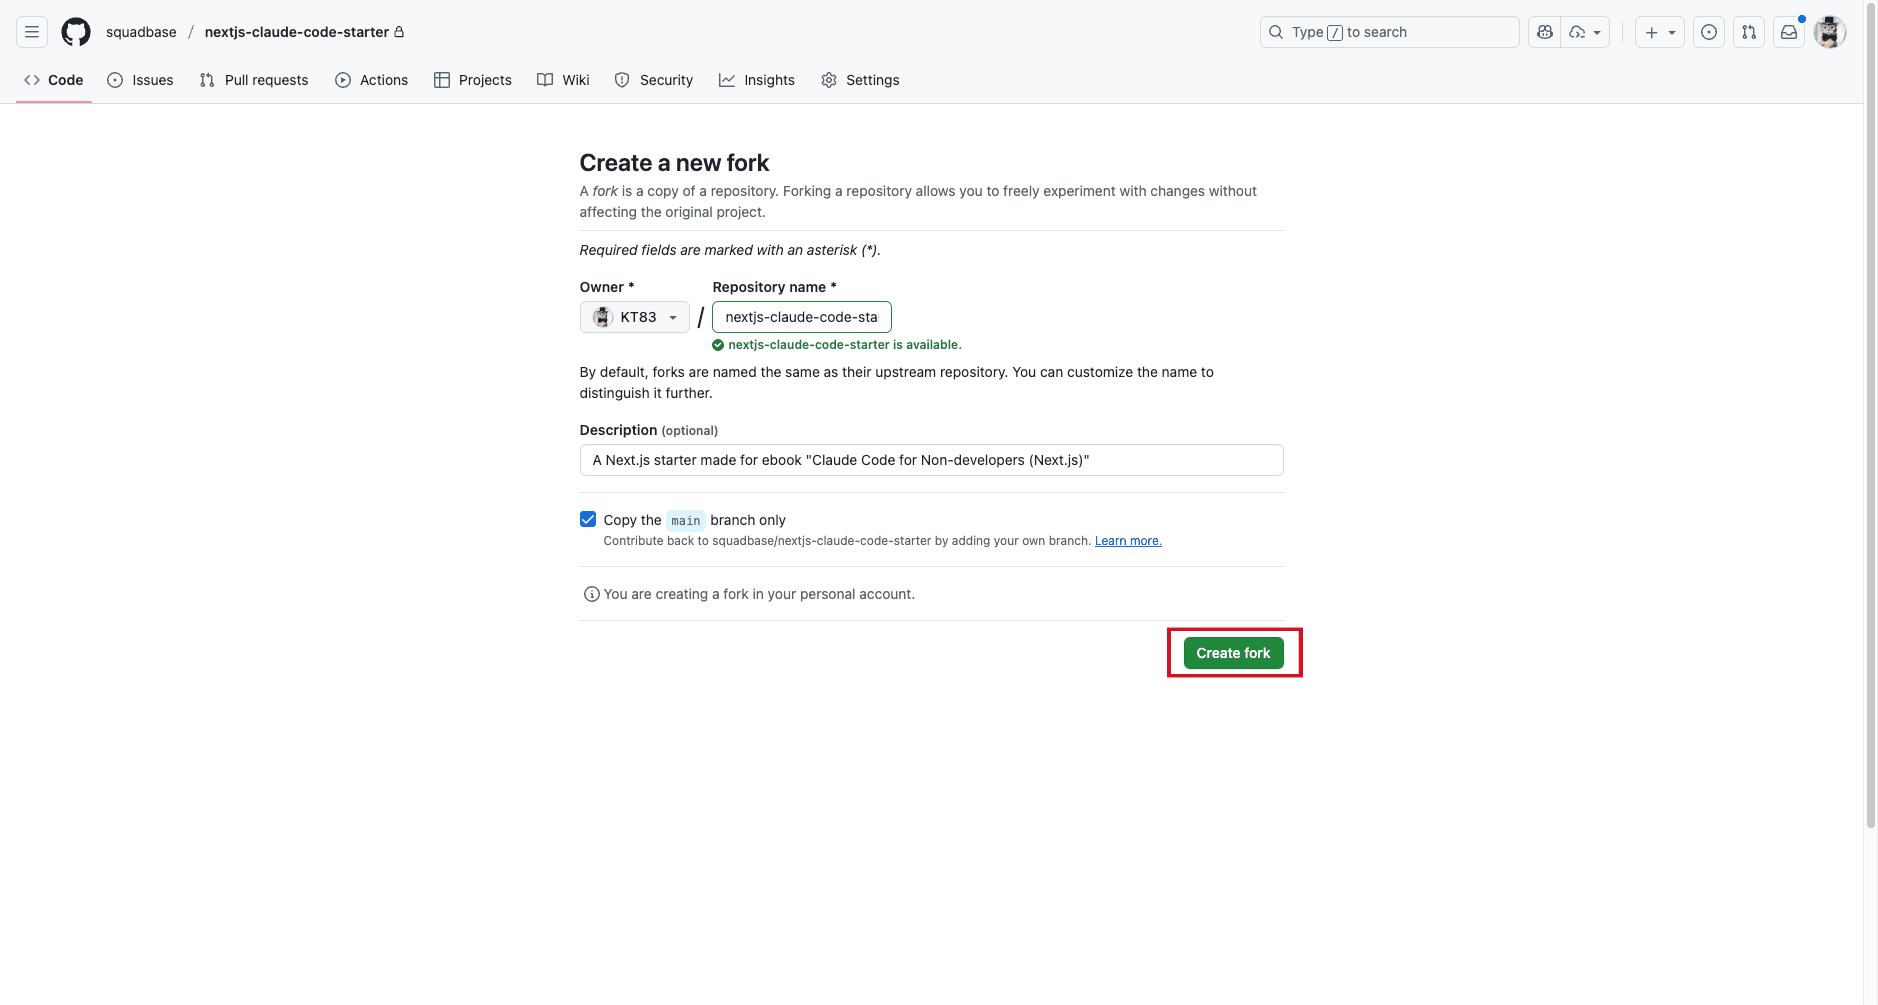
Once forking is complete, a repository will be created in your account. On this repository's page, click the green "Code" button, select the "Codespaces" tab, and click "Create codespace on main."
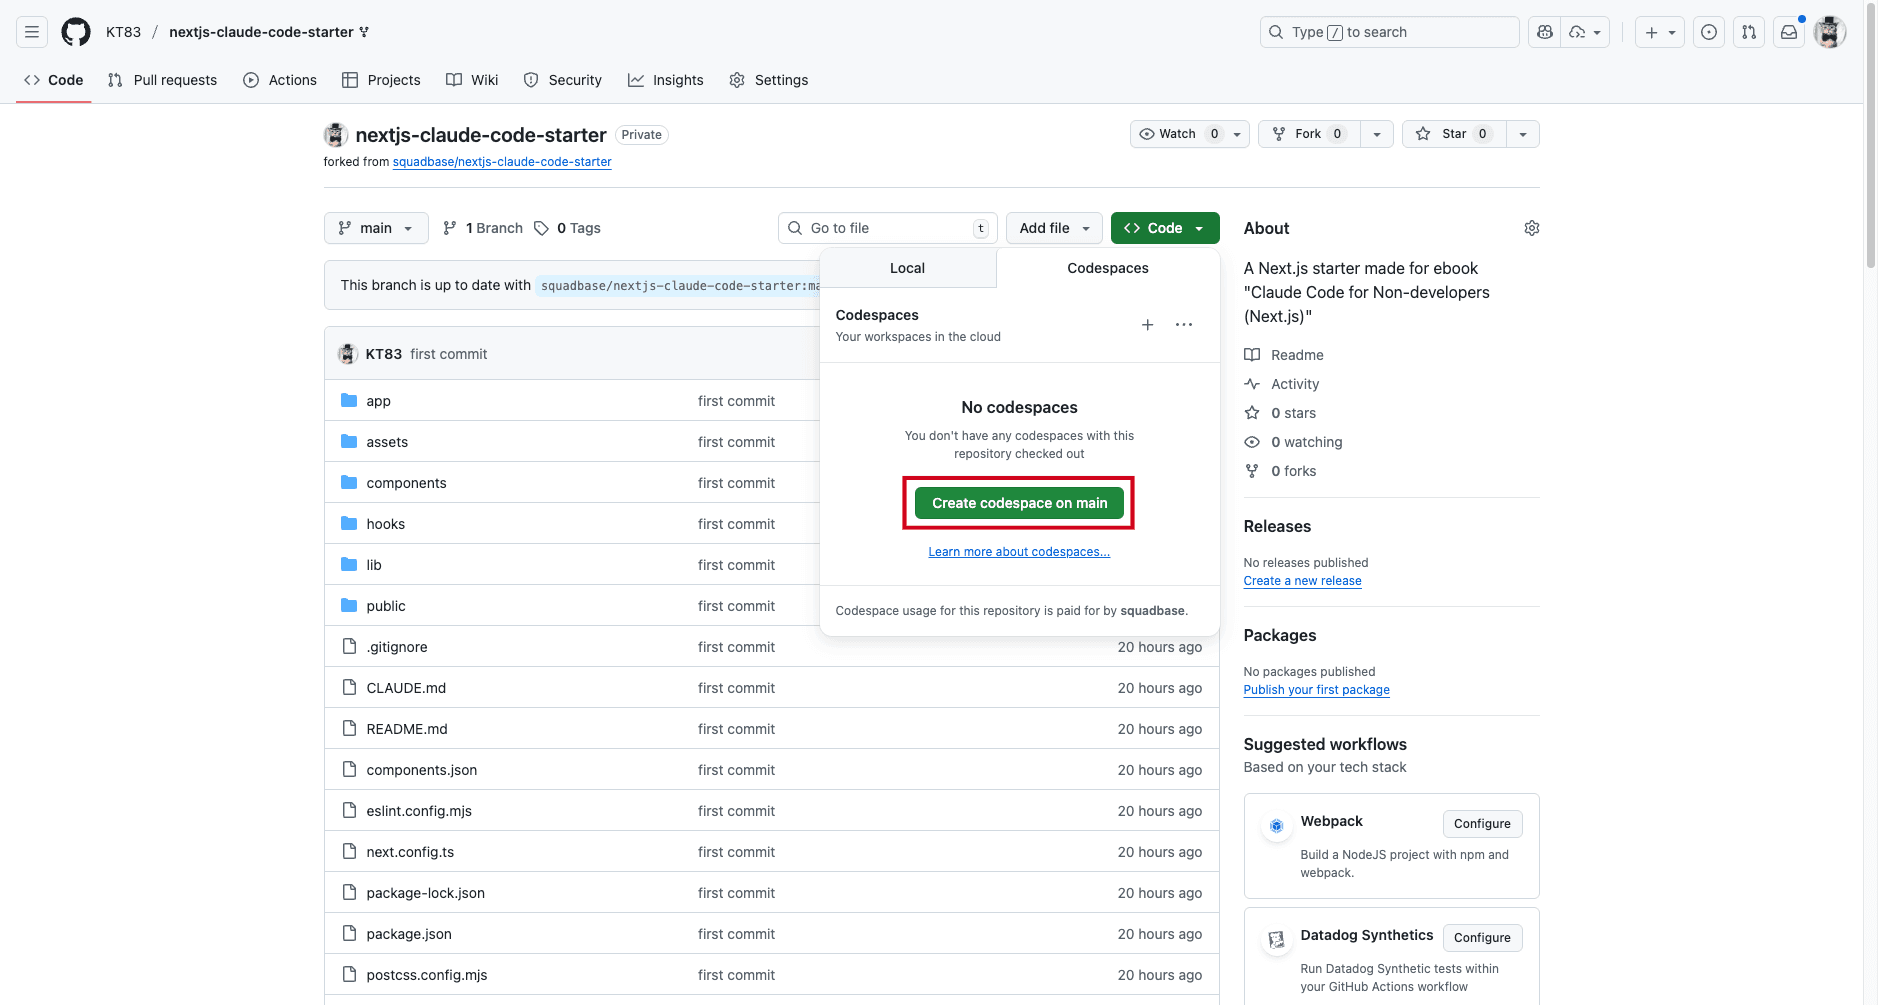
When you click, a development environment will be built in the cloud. The initial startup takes 2-3 minutes, but necessary software and libraries are automatically installed.
When startup is complete, the web interface of VS Code (Visual Studio Code) will appear in your browser. This is a popular code editor used by engineers worldwide.
The file explorer on the left displays the project's file list. The editor section in the center is where you edit code. The terminal at the bottom allows you to execute commands.

Practical Exercise - First Next.js Execution
Let's actually run commands to start a Next.js application. Usually, development requires these two steps:
-
Install project dependencies: Install the necessary "components (libraries)" to run the project all at once. You can install them by running the
npm installcommand from the terminal. -
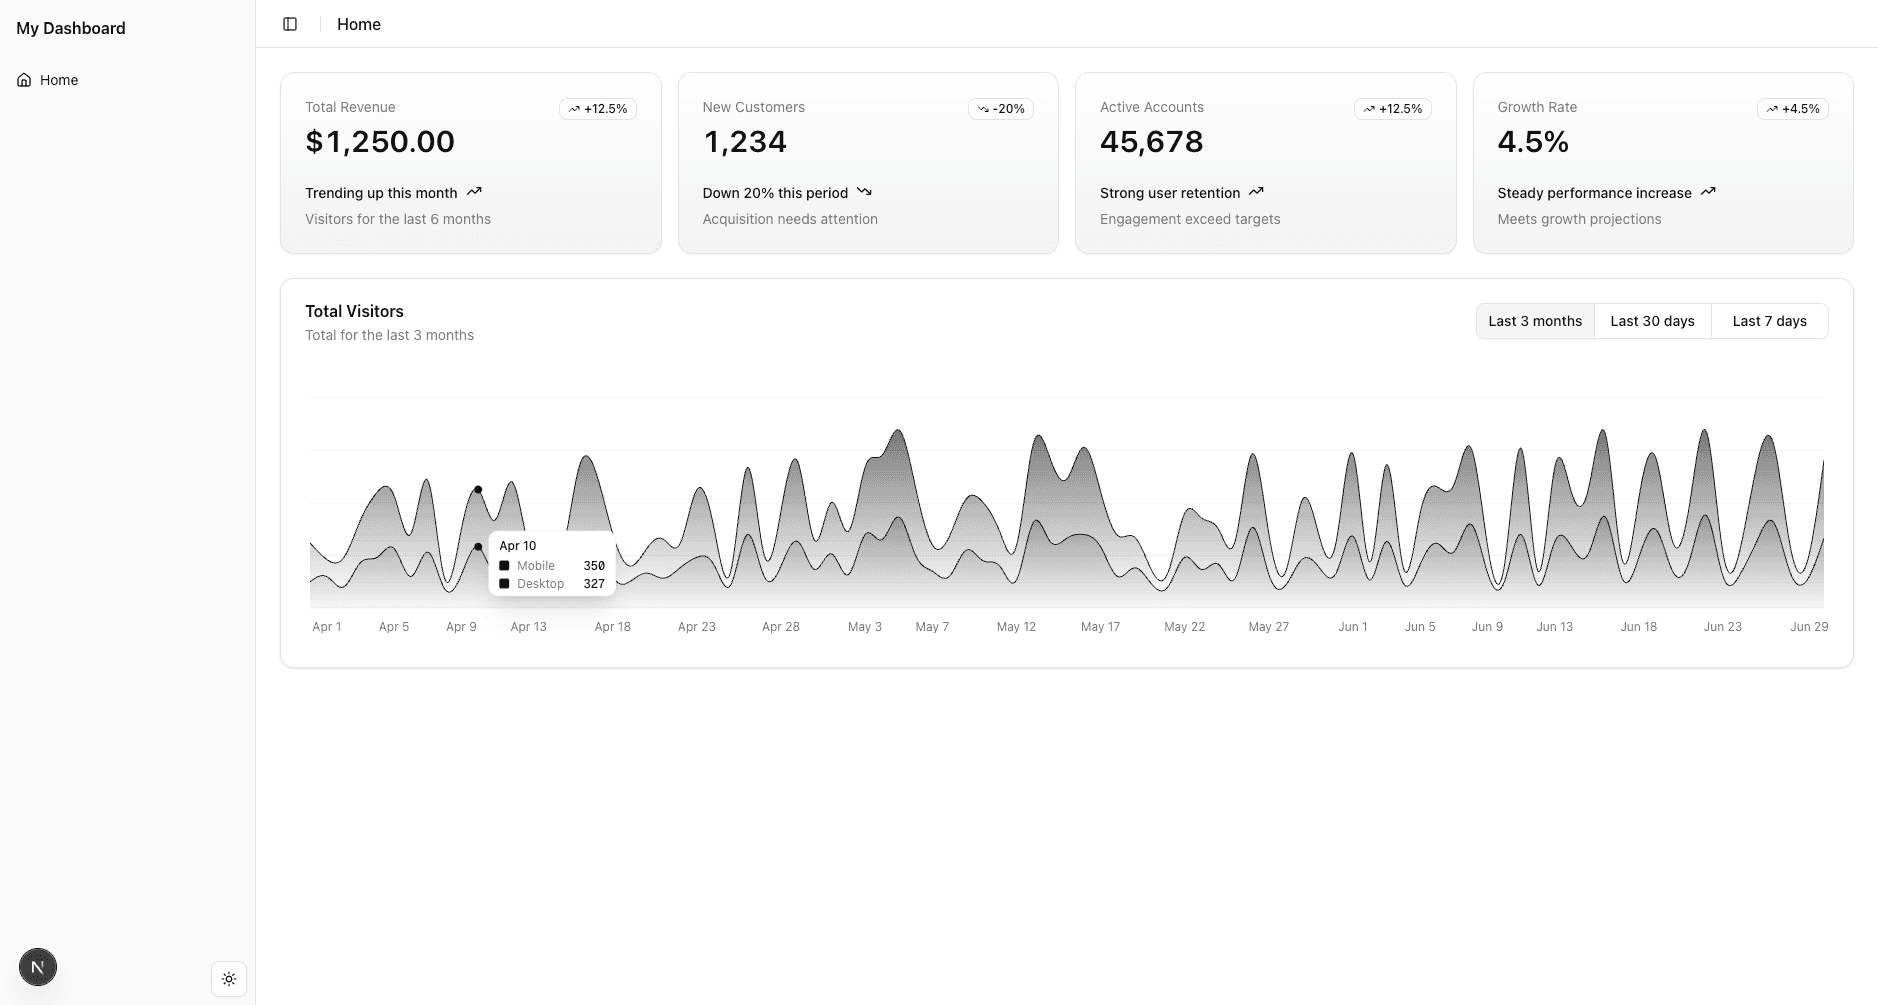
Start development server: You can start the development server by running the
npm run devcommand from the terminal.
Let's start the application. Enter the following command in the terminal at the bottom of the window and press Enter to execute:
npm run dev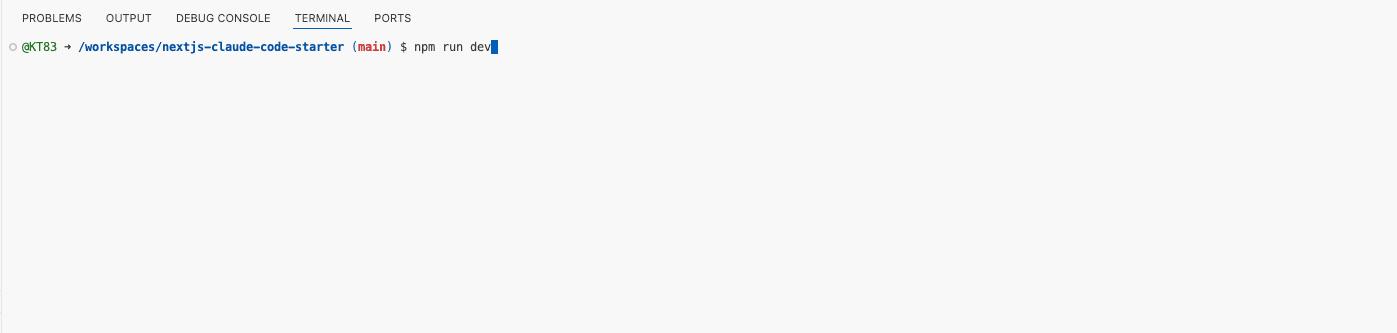
If you want to stop the application execution, press Ctrl+C in the terminal screen where you entered commands. Before proceeding to the next chapter, let's stop the application once with Ctrl+C.
Review and Next Steps
With the work so far, you've set up an environment where you can write code in your browser without complex local installation work.
Items completed this time:
- Launching development environment with GitHub Codespaces
- First startup of Next.js application
In the next chapter, we'll use Claude Code to deepen our understanding of code. We'll overcome fear of the terminal while advancing programming through dialogue with our AI development partner.
Get your first dashboard in 10 minutes
Free to get started · No credit card required
Start talking to your data